See more. Control more. Optimize more.
From overspray to perfection -
Innovative control systems that pay off
Optical quality control for perfect paintwork and coatings
Perfectly applied paint sprays, paints and coatings are essential for the quality, functionality and durability of products. Faulty spray patterns, uneven coating thicknesses or excessive material consumption due to overspray not only lead to visual defects, but also to considerable economic losses. With LaVision’s optical analysis methods, all application processes can be visually recorded, evaluated and precisely optimized. Our modular measuring systems enable end-to-end quality assurance – from the spray can to robot-controlled high-performance painting.
The right partner for your product quality
Leading automotive manufacturers (OEMs), machine builders and paint line operators worldwide rely on our measurement technologies for monitoring, optimization and quality assurance in industrial production. By fully integrating our measurement systems with our powerful DaVis software, we support our partners from research and development through quality management to inline quality measurement in ongoing production.
Reduction in production costs – Faster inspection processes & early fault detection
Versatile and comprehensive quality assurance
Paint sprays & aerosol paints - spray analysis for precise application
- Spray pattern analysis: Detection of irregularities in the shape, density and symmetry of the spray pattern for optimum distribution.
- Evaluate atomization mechanism: Visualization of spray break-ups to fine-tune aerosol technology.
- Check dispensing behavior: Analyze the pressure profile and dispensing accuracy of spray paint cans and aerosol paint solutions.
Industrial wet paints & spray coatings - making quality visible
- Optimize painting robots & spray guns: Visual analysis of spray behavior for automated processes with maximum application quality.
- Check surface distribution: Uniformity and homogeneity of the paint layer are precisely measured and evaluated.
- Reduce overspray: Increase efficiency by controlling spray mist and targeted application.
- Visualize flow behaviour: Analysis of air flows and paint mist movements to optimize coating processes.
Powder coatings - Analyze processes. Improve results.
- Improve surface quality: By precisely analyzing the particle distribution, uniform and highly adhesive powder coatings can be achieved in a targeted manner.
- Reduce material losses: Visual evaluation of particle deposition enables optimization of the application and saves powder material.
- Coordinate systems: The evaluation supports the precise adjustment of powder coating systems to different substrates and geometries.
Coatings for automotive & aviation - precision for demanding surfaces
- Focus on special paints: Our optical spray analysis records the distribution and hiding power of high-gloss and functional special paints – ideal for premium vehicles and aerospace components.
- Analyzing nanocoatings: Using visual measurement methods, ultra-thin protective coatings can be characterized in detail and their application optimized.
- Evaluating safety and protective coatings: Optical quality control makes fluctuations in functional coatings visible – from scratch resistance to corrosion protection.
Special applications & high-tech coatings - reliably visualized
- Testing water-repellent coatings: Optical measuring systems make the distribution of hydrophobic coatings visible and objectively evaluate their effectiveness.
- Analyzing thermal protective coatings: Thanks to visualizing analysis methods, heat protection layers for high-performance components can be specifically optimized.
- Evaluate non-stick & corrosion protection: Optical spray analysis can detect even invisible differences in application thickness and uniformity – crucial for industrial longevity.
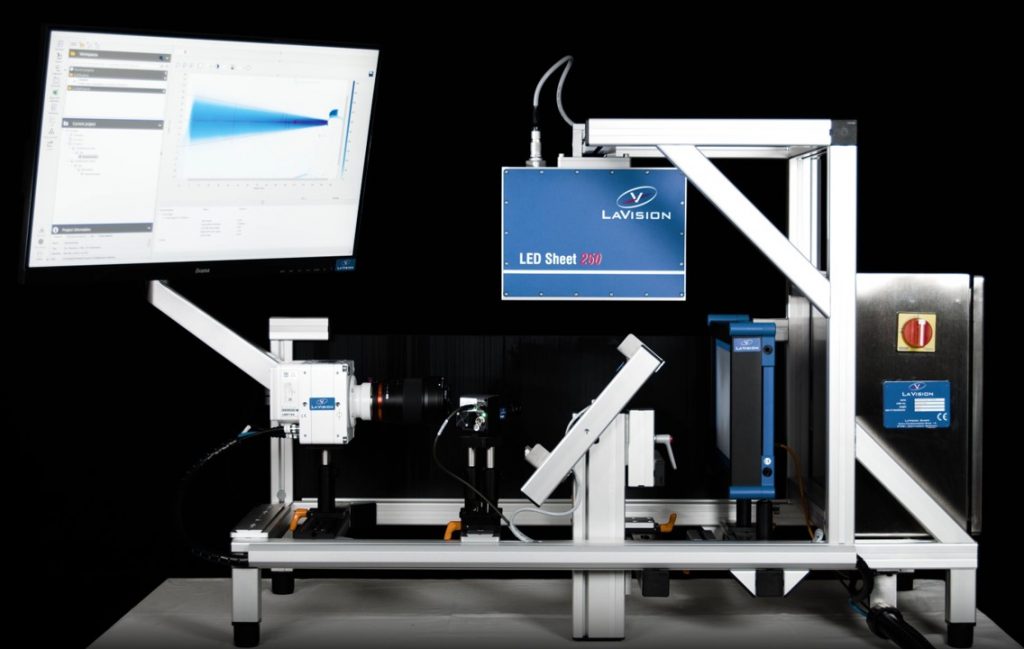
SprayMaster inspex- High-precision quality control for paintwork and coatings
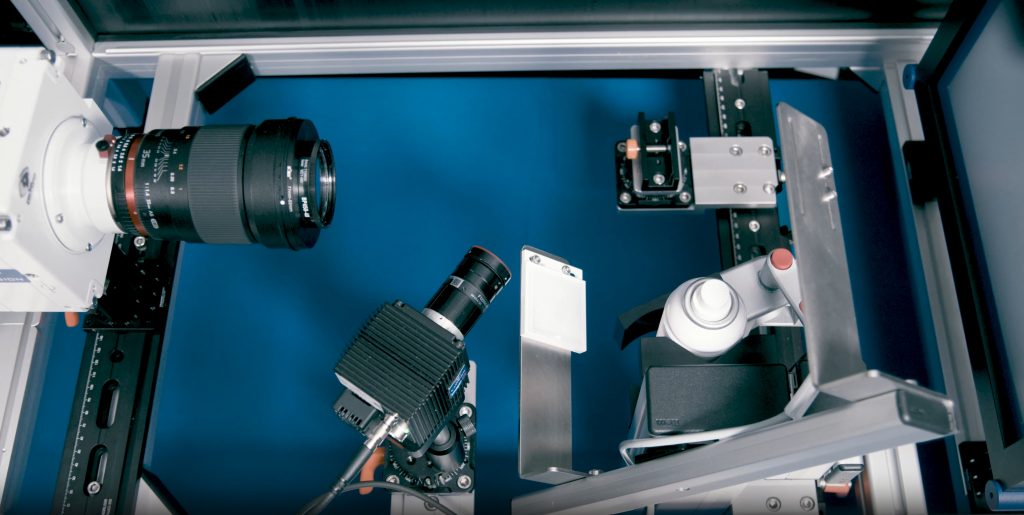
System & components
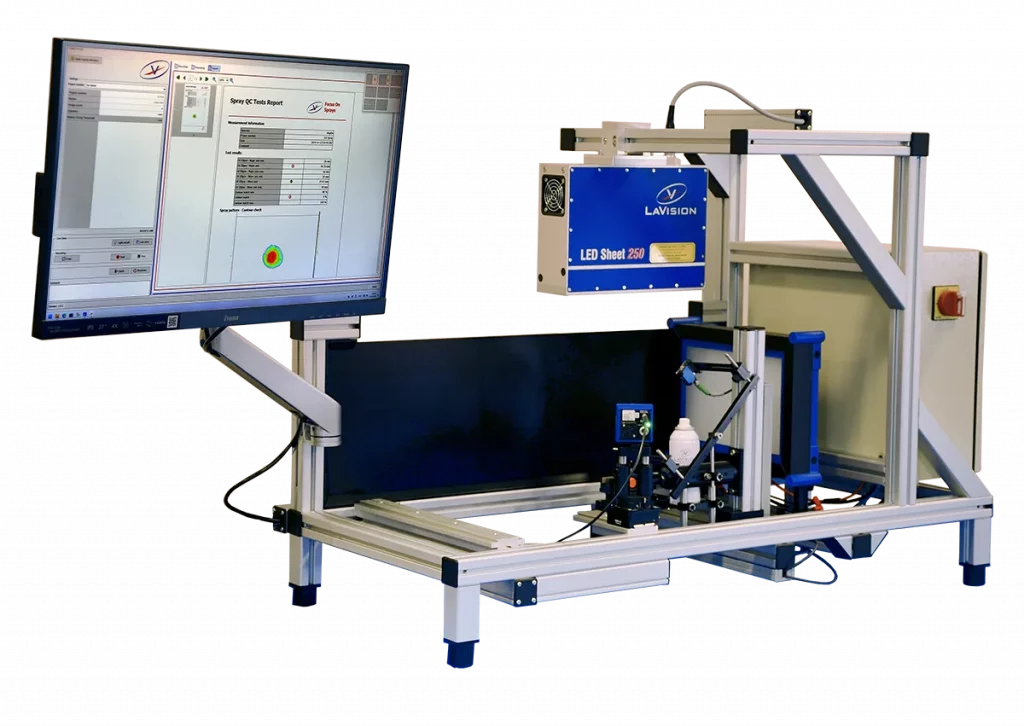
Measured variables & analysis areas
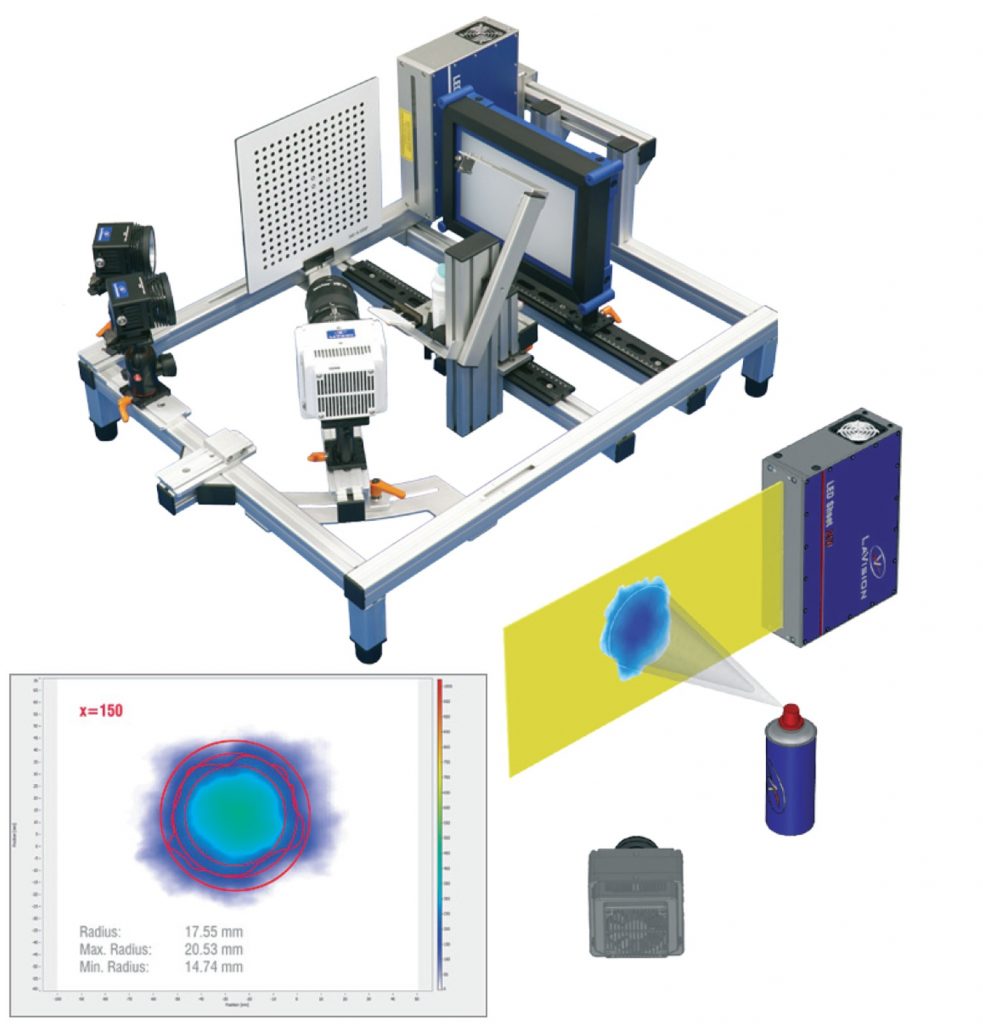
Spray cone analysis:
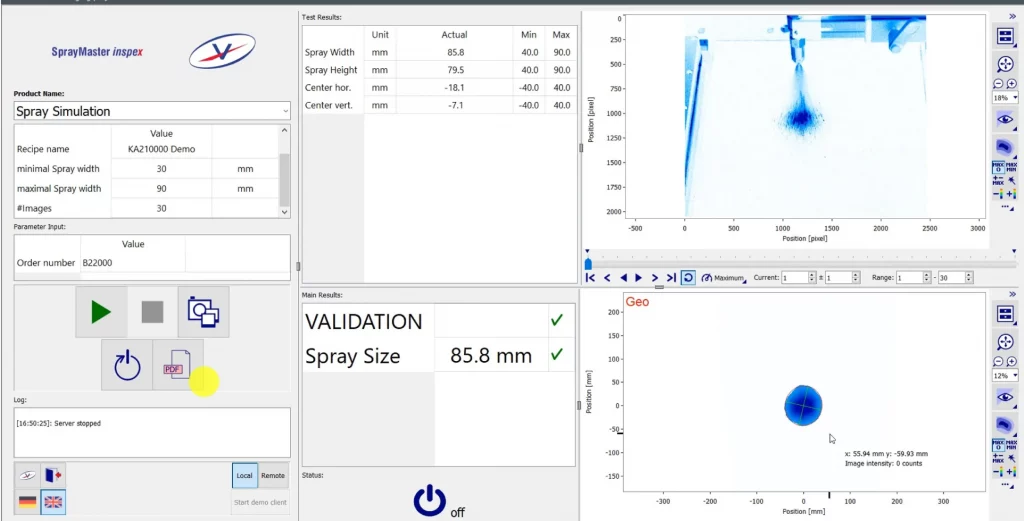
The spray cone influences the application efficiency and the subsequent homogeneity of the painted and coated surfaces. The system precisely measures the cone angle, the penetration depth and the symmetry of the spray jet to ensure optimum spray distribution for different application areas.

Modularity & flexibility
- Universal holder: Adaptable for various spray nozzles, spray bottles and other applicators
- Quick change between measuring tasks: Flexible adjustment for different test methods and formats
- Expandability: Additional modules for specific measurements such as droplet size distributions or spray characterization
- Flexible configuration: adaptation of test setups for different liquids and spray systems
- Easy integration: Compatible with high-speed cameras, additional sensors and other analysis modules
- Long-term investment security: scalable system that grows with new research requirements
Advantages for quality assurance
- Highest precision: Scientifically sound measuring methods for exact spray characterization
- Digital & reproducible results: Comparability with reference test images for consistent quality assurance
- Automatic test reports: Efficient documentation and archiving of all measured values
- Most accurate measured values: thanks to innovative algorithms of the DaVis software
- Collaborative working: Support from the powerful DaVis software, including free DaVis viewer
- Use in various test environments: Can be used inline, atline or offline for maximum flexibility

You are currently viewing a placeholder content from YouTube. To access the actual content, click the button below. Please note that doing so will share data with third-party providers.
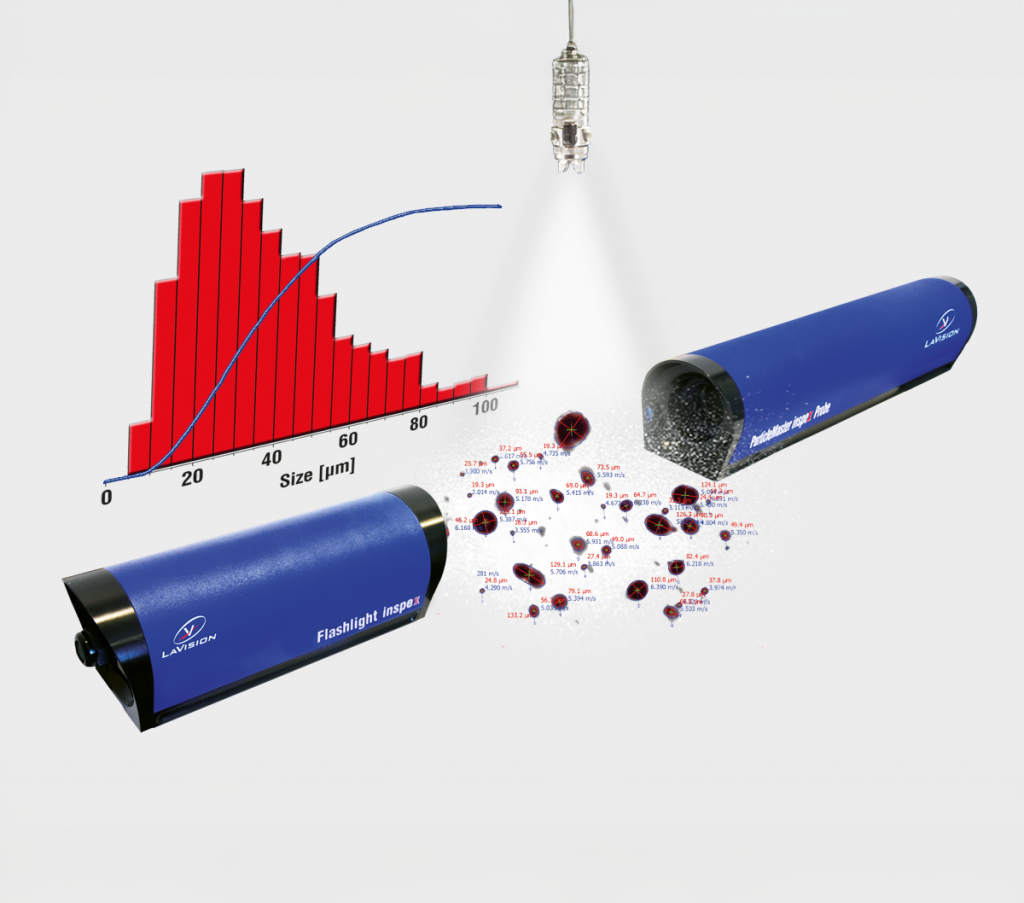
More InformationParticleMaster inspex - Precise droplet and particle analysis for quality testing
System & components

Measured variables & analysis areas
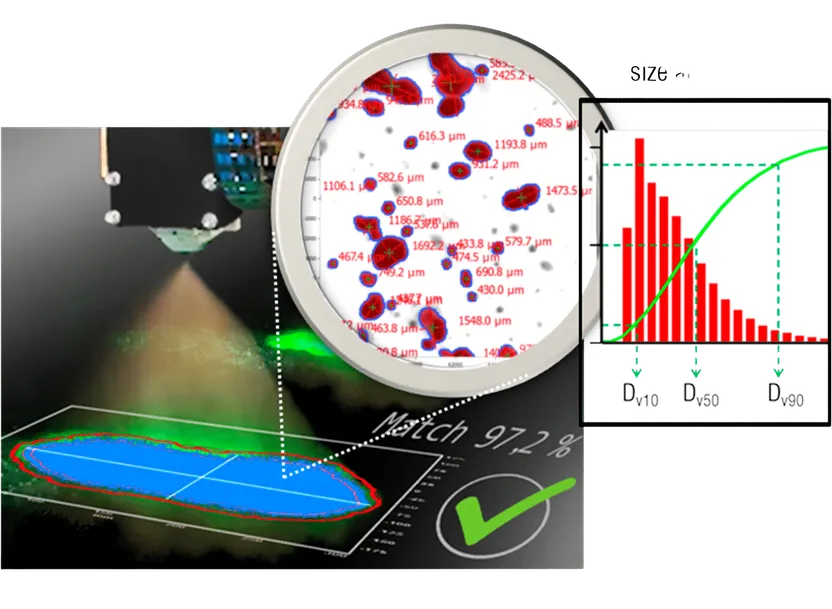
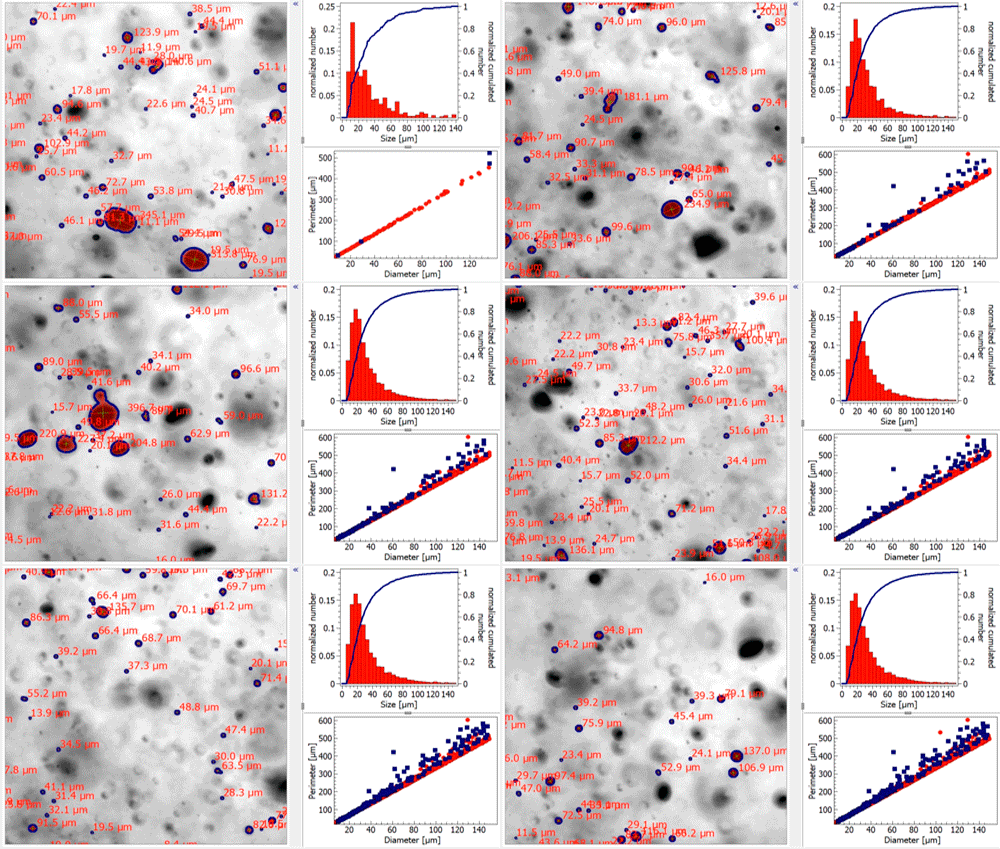
- Droplet size distribution: (DV10, DV50, DV90) for uniform paint application
- Particle concentration: Number and mass concentration within the spray jet
- Particle homogeneity: shape, density and uniformity across the spray cross-section
- Particle size distribution spectrum: Detection of minimum to maximum diameters between 10 – 2,500 µm depending on equipment model and application
- Spray density profiles: Distribution of particle concentration over the width and depth of the spray
- Particle velocity (optional for combined measurement): Velocity and dynamic distribution of individual particle droplets
These measured variables enable precise quality control and process optimization in product development.
Advantages for industrial quality control
- Highest precision: Scientifically sound measuring methods for exact droplet and particle analysis
- Digital & reproducible results: Comparability with reference values for consistent quality assurance
- Automated data acquisition & evaluation: Efficient analysis with powerful DaVis software
- Use in various test environments: Can be used inline, atline, online or offline for maximum flexibility
You are currently viewing a placeholder content from YouTube. To access the actual content, click the button below. Please note that doing so will share data with third-party providers.
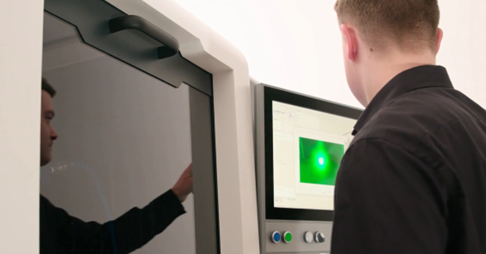
More InformationSprayMaster inspex Test Chamber - Protected test environment for industrial quality control
System & components
- Fully enclosed test chamber with controlled environmental conditions
- Mounting the SprayMaster inspex and ParticleMaster inspex for combined measurements
- Reduction of impurities and environmental influences on the measurements
Measured variables & analysis areas
- Spray pattern test – homogeneity, shape & uniformity of the spray application
- Spray cone analysis – cone angle, penetration depth and spray distribution
- Droplet size and particle measurement – control of paint distribution as well as droplet homogeneity
Advantages for industrial quality control
- Automated data acquisition and documentation for complete traceability
- Fast and efficient test cycles – ideal for production environments
- Certified quality assurance according to international standards
- Predefined test plans
- Intuitive user interface for quick and uncomplicated training of operating personnel
- Significantly higher throughput in quality control – increased efficiency
- Existing rights management for the various functional levels
Intelligent quality control with the LaVision Quality Control software
- Automatic image processing and data evaluation
- Real-time comparison with reference samples and quality standards
- Complete documentation and reporting for production processes
You are currently viewing a placeholder content from YouTube. To access the actual content, click the button below. Please note that doing so will share data with third-party providers.
More InformationMaximum efficiency in quality control
Our practical experience: Our integrated QC systems significantly reduce the inspection time and reduce the number of quality returns with regard to painting and coating quality to zero.
Fully automated quality assurance on a new level:
- Faster test cycles thanks to automated data acquisition
- Seamless documentation for maximum traceability
- Error minimization and process reliability for optimized production
Stable processes. Reliable data.
Highest surface quality.
Optical measuring systems from LaVision enable the precise analysis and evaluation of spray patterns, droplet sizes and layer distributions – directly in the development or quality process. Our powerful evaluation software ensures reproducible results, transparent comparisons and well-founded decisions. This increases your process reliability, reduces material losses and ensures consistently high product quality.
